Getting Started with Study Connect
A step-by-step guide to working with sponsors and CROs in Veeva SiteVault.
What is Study Connect?
Study Connect is an application within Veeva SiteVault that allows the secure exchange of trial information with sponsors and Clinical Research Organizations (CROs) using Veeva technology.
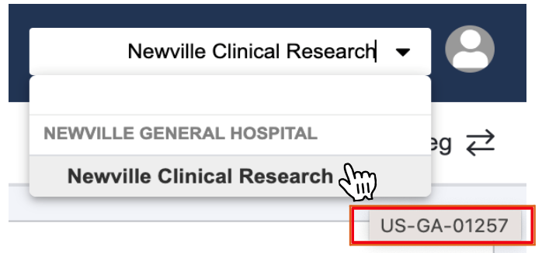
Before getting started, locate your Universal Site Number (USN):
- Log in to SiteVault and navigate to Study Connect.
- Hover over your site name in the top right corner.
- Important: Provide your USN to your sponsor or CRO so they can connect to your SiteVault.
Locate Your USN
1. Accept the Study Invitation to Connect
You own and control the data in your SiteVault; accepting the study invitation from your sponsor or CRO indicates that you agree to use SiteVault Study Connect to exchange study information.
You will receive an email notification when your Sponsor or CRO has issued the study invitation:
- Log in to SiteVault Study Connect and navigate to the Studies tab. Here you will see the study identifier and a status of Pending Invitation.
- To accept the invitation, select the study, review study details, and resolve study and product.
- Once you click Accept, the study will be created and your connection with your Sponsor or CROs vault will be established.
Need Help? Contact support at sitevaultsupport@veeva.com.
Accepting or Rejecting Invitations in Study Connect
2. Add Your Study Team
Add the study team members that will need access to Study Connect to collaborate on document exchange with your sponsor or CRO.
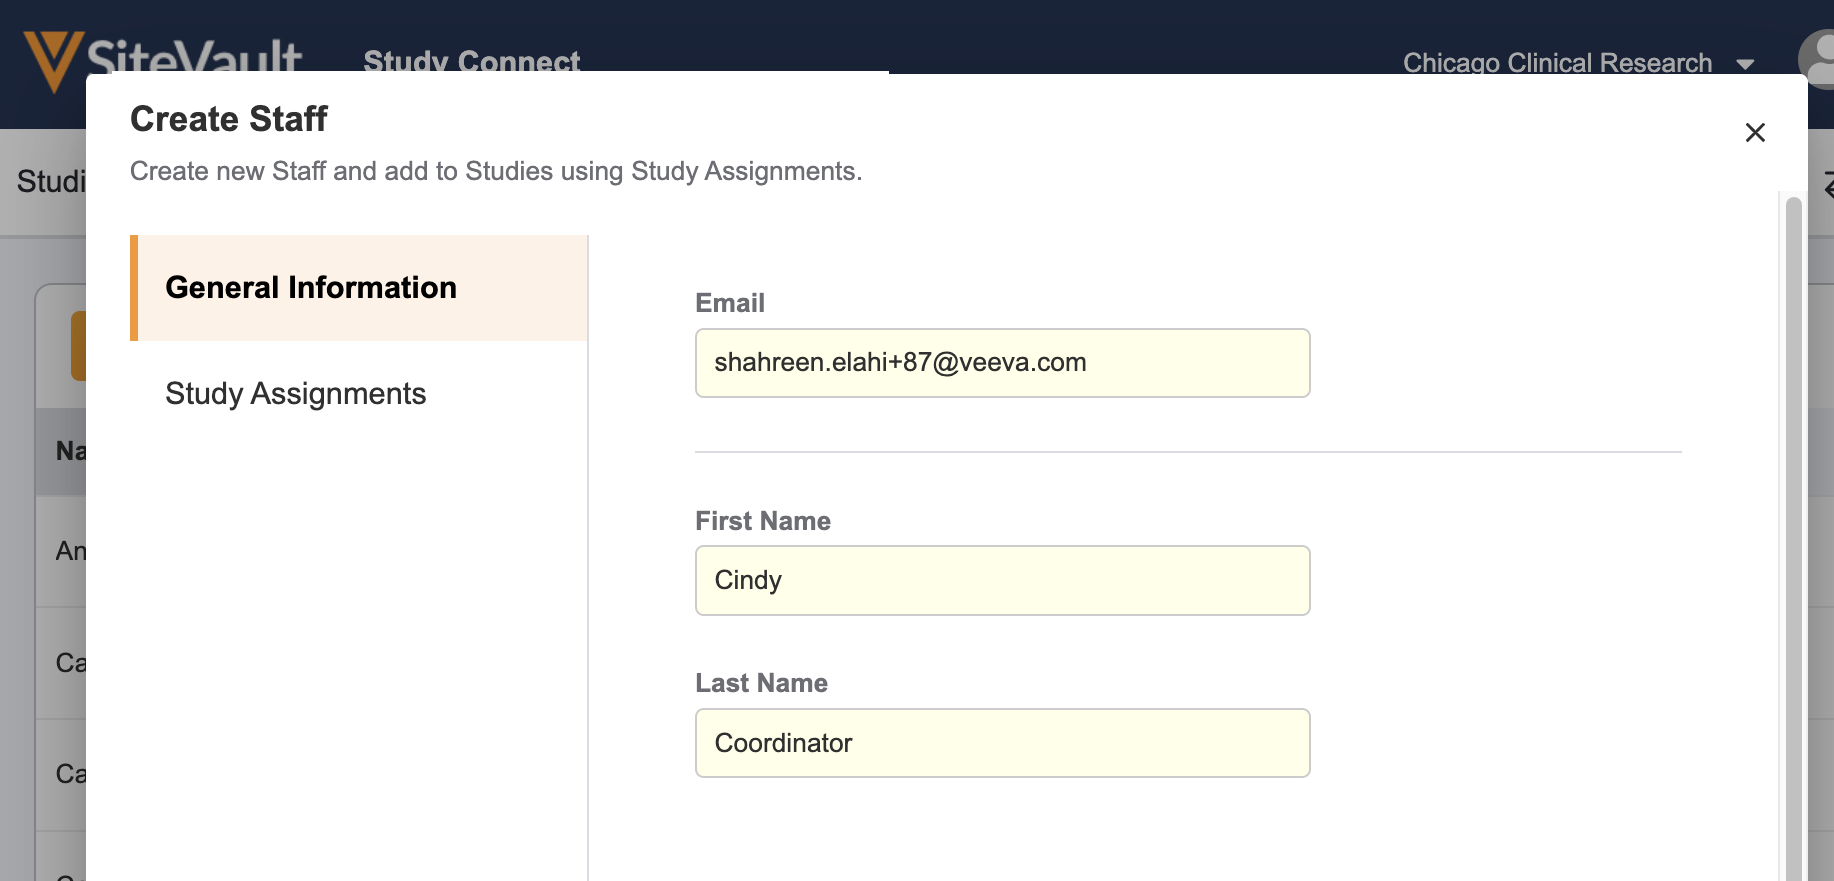
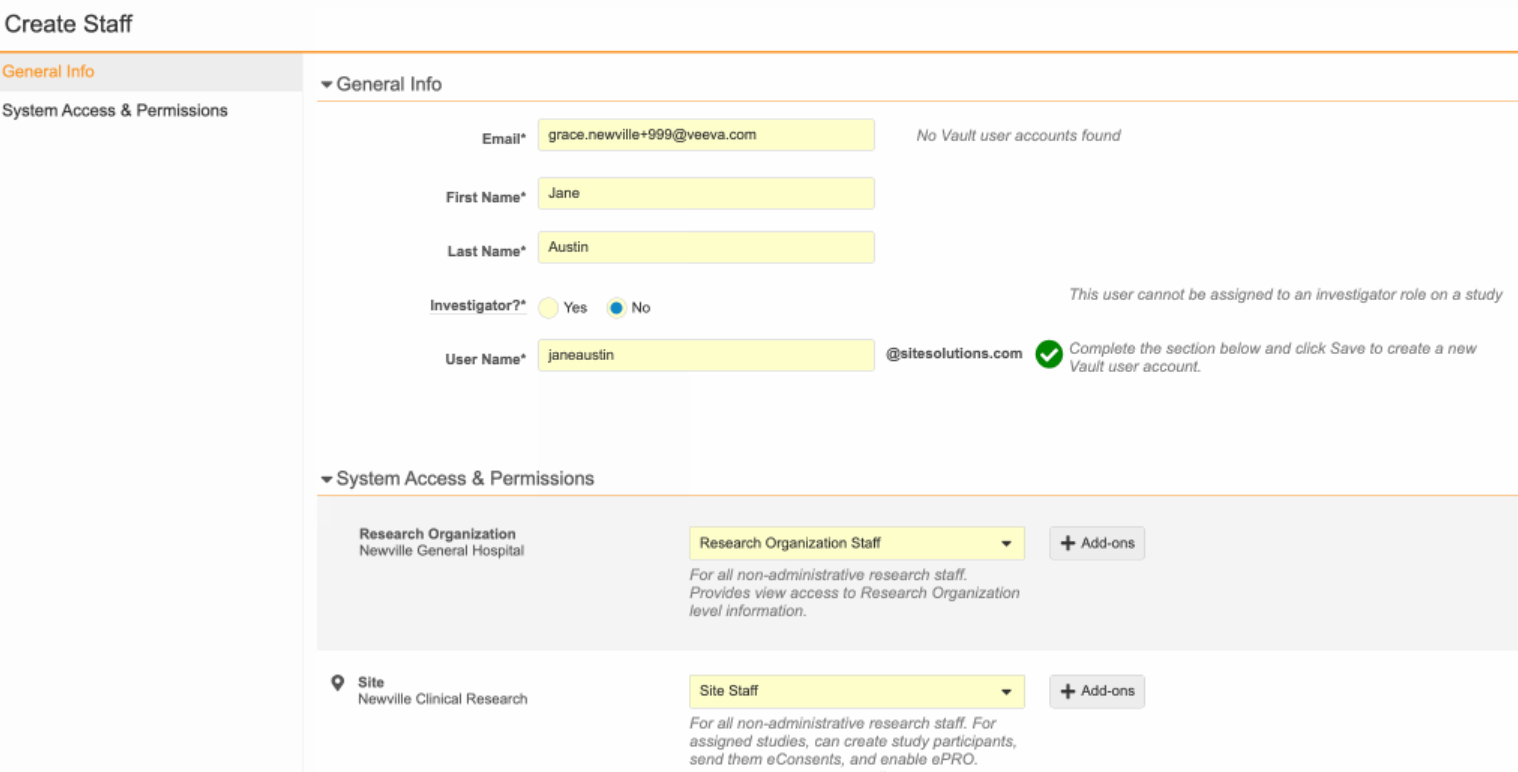
- Navigate to the Staff tab in Study Connect and select Create New Staff.
- Enter the staff’s general information: email address, first name, and last name.
- Select Next and assign the staff to the study.
- Click Save. The new user will receive a welcome email with a username and link to login and set their password.
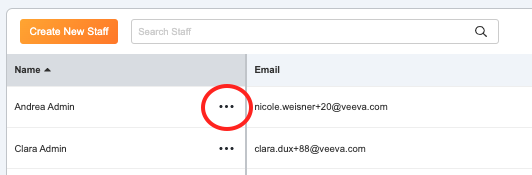
- To edit account settings or resend a welcome email, select the action menu (…) next to the staff’s name.
Need Help? Contact support at sitevaultsupport@veeva.com.
Creating and Managing Users in Study Connect
Locate the Action Menu
3. Exchange Regulatory Documents
The Document Exchange section in the study gives you access to all documents and actions from your sponsor or CRO.
You will receive an email notification when you have new document actions available. Log in and navigate to the Studies tab and select your study with a status of Action Needed.
View and complete the required Document Actions:
Update and Return: Documents that require updates before returning to your sponsor or CRO
- Click the download icon to download a copy of the document.
- Make required updates.
- Use the envelope icon to upload the updated document from your file explorer and click Send.
Provide Document: Documents that need to be sent to your Sponsor or CRO from your files
- Click the envelope icon next to the document request and upload the document from your file explorer.
- Click Send.
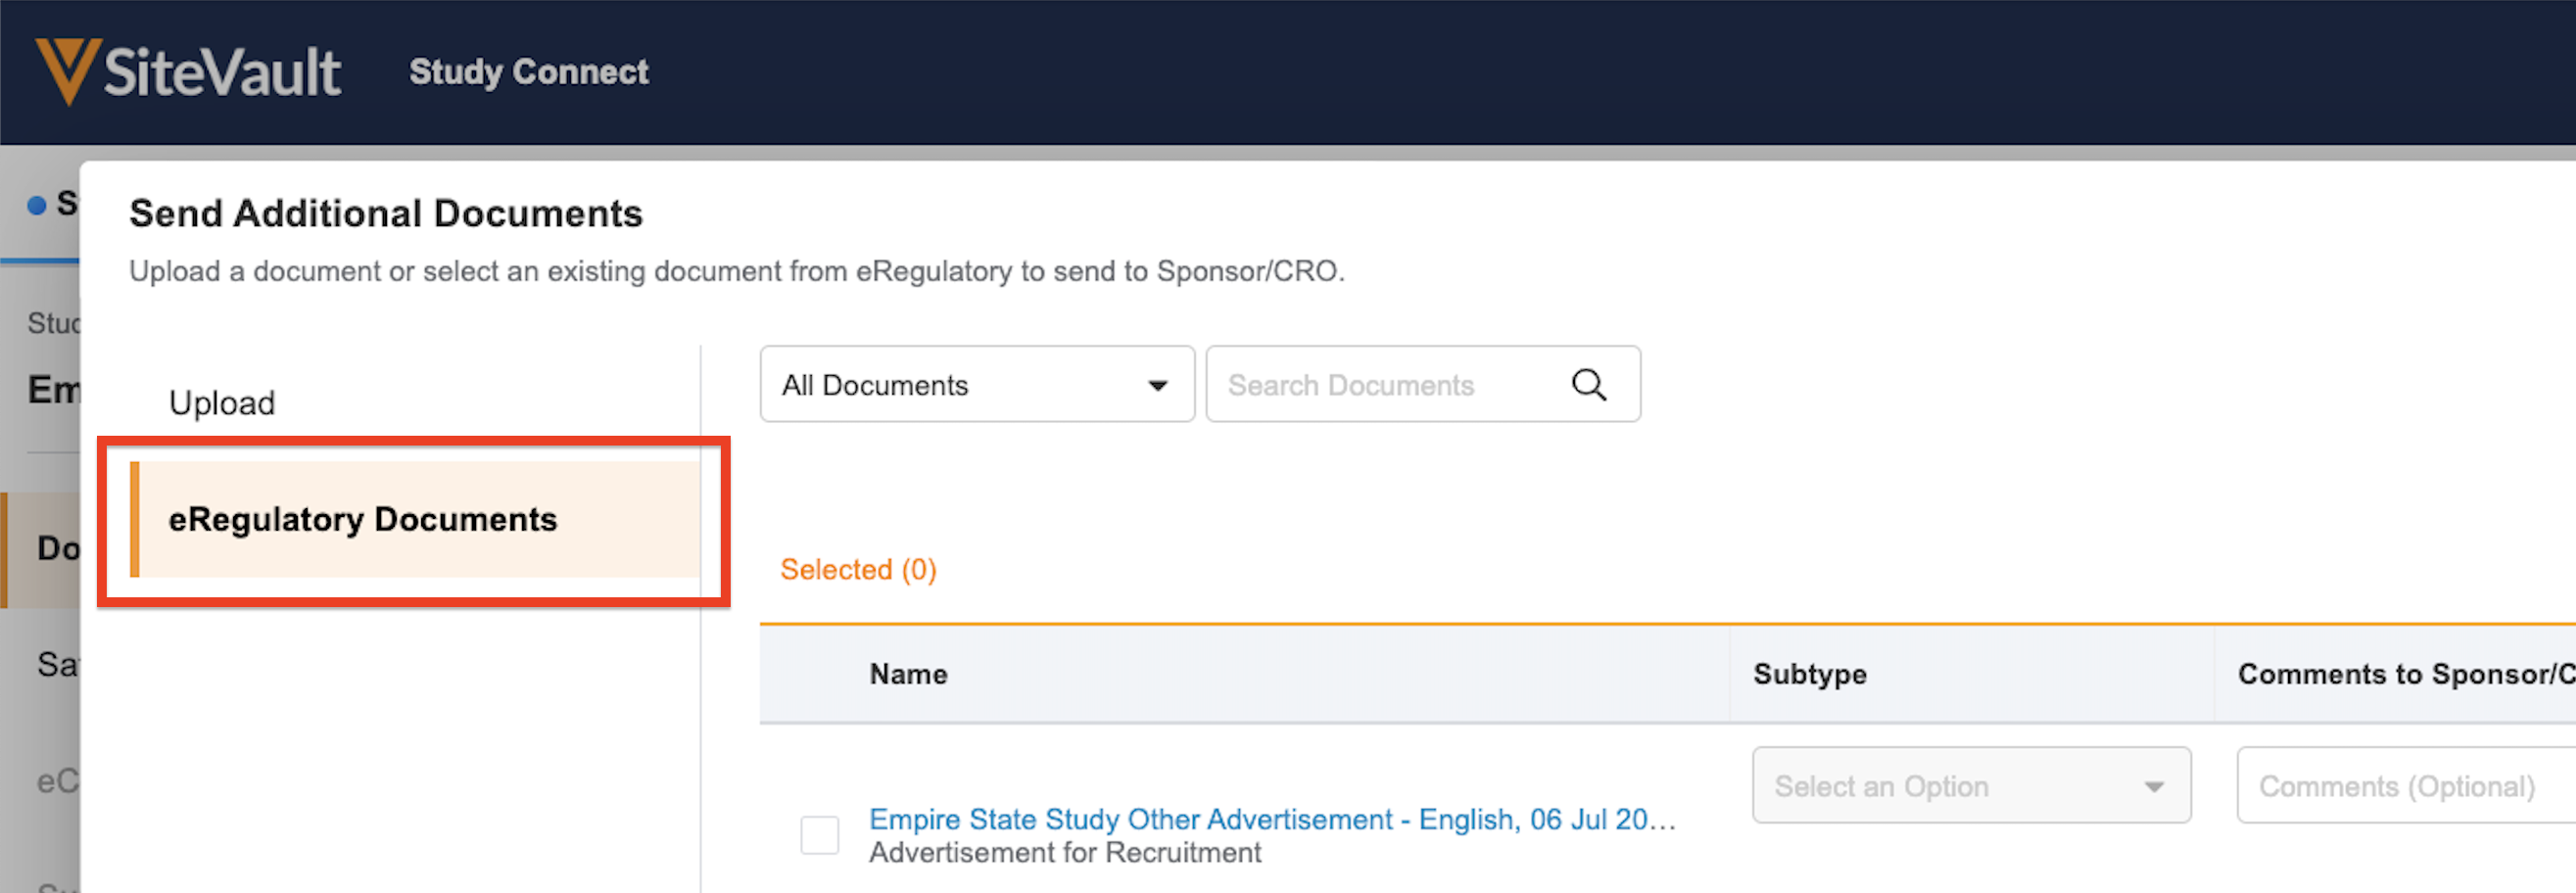
Send Additional Documents: Other documents to be sent to your Sponsor or CRO
- Select Send Additional Documents.
- Upload up to 100 documents from your file explorer and select the document types from the dropdown.
- Click Send.
Locate documents sent from your sponsor or CRO that require no action by navigating to the Documents > Received tab.
Need Help? Contact support at sitevaultsupport@veeva.com.
Document Exchange in Study Connect
Locating Documents Received
Optional: Acknowledge Safety Documents
If your sponsor is utilizing Safety Distribution, you will receive an email notification when new safety documents are available to review and acknowledge.
- Navigate to Study Connect.
- Open your study and select the Safety Distribution tab.
- Select the check box next to each safety document and click Mark as Read.
Need Help? Contact support at sitevaultsupport@veeva.com.
Safety Distribution in Study Connect
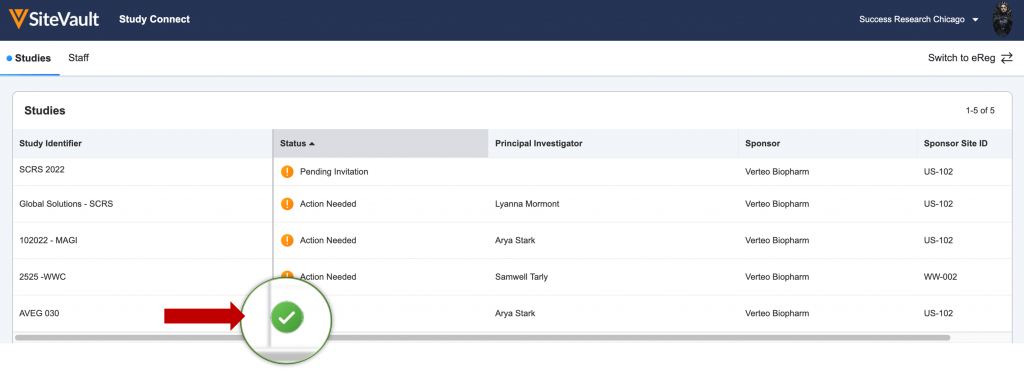
Your initial regulatory packet is complete!
Once all actions are complete, you will see a green check mark under the status of the study. You will receive an email notification if your sponsor or CRO sends additional documents or actions.
Exchanging documents through Study Connect automatically makes them available in SiteVault eReg. If your sponsor or CRO has requested that you maintain your Investigator Site File (eISF) in SiteVault, follow the steps below.
What is SiteVault eReg?
SiteVault eReg is an electronic investigator site file (eISF) that provides remote access to regulatory and source documents. It is compliant with global industry regulations (including 21 CFR 11, Annex 11, and GDPR) and can be used across all studies.
To begin using SiteVault as your eISF, select the Switch to eReg toggle located in the top right corner of the screen.
Toggle to Switch Applications
1. Locate Your Study Documents in the eBinder
All documents sent and received via Study Connect are automatically filed to the eBinder in the Draft or Received from Sponsor/CRO state. These documents will need to be finalized in order to be reviewed by a monitor:
- Navigate to Documents > eBinder.
- Select the appropriate study from the study selector (top left).
- Turn on the Show Drafts toggle to view documents in the Draft or Received from Sponsor/CRO state.
- Use the action menu (…) next to each document to update its status. Depending on the document type, your options will be Approved for Use, Current, Final, Fully Executed, or Finalized.
Need Help? Contact support at sitevaultsupport@veeva.com.
Locate and Finalize Documents in the eBinder
2. Grant Additional Study Team Access
Create staff profiles in SiteVault eReg for study staff that were not previously granted access through Study Connect:
- Navigate to Administration > Staff and select Create.
- Enter the staff’s email address, then select Check Email.
- Complete the required fields and select System Access and Permissions using the dropdown. Choose Admin for two or three team members who work across all study and edit and manage documents. Choose Staff for everyone else.
- Click Save. The new user will receive a welcome email with a username and link to login and set their password.
Assign study team as active on the study:
- Navigate to the Studies tab and select the applicable study.
- Open Study Team Assignments.
- Select Create, choose Study Role and User, and click Save.
- Change state from Proposed to Active.
Need Help? Contact support at sitevaultsupport@veeva.com.
Grant Staff Access
Create a Study Assignment
3. Upload Additional Study Documents
When uploading documents, you will be prompted to enter additional information regarding its content. This generates the document name and determines where it is filed in the eBinder. Once the document is in the final state, it will be available for monitoring review.
- Navigate to Documents > eBinder and select the appropriate study.
- Click Upload and select up to 20 files to upload from your computer. You can also drag and drop documents directly into the eBinder.
- Choose the Document Type from the dropdown.
- Select Upload as Approved for Use/Current/Final to upload directly to the final state, or select Upload as Draft if the document is incomplete.
- Complete the required fields highlighted in yellow. If the required information is not already created, such as organizations or products, you can create these directly from the document uploader.
- Click Save.
Documents uploaded in eReg can be sent to your sponsor or CRO in Study Connect:
- Navigate to the study in Study Connect and select Send Additional Documents.
- Select the documents from the eRegulatory Documents tab.
- Click Send.
Need Help? Contact support at sitevaultsupport@veeva.com.
Upload Documents to the eBinder
Send eReg documents to Sponsor or CRO from Study Connect
Optional: Add Your Monitor to SiteVault
Adding your monitor to SiteVault enables them to review documents and provide real-time feedback electronically.
- Navigate to the Administration > Monitor & External Users tab.
- Enter the monitor’s email and click Check Email.
- If an existing username is found, confirm with your monitor if this is their preferred account prior to selecting.
- If no existing account is found, enter the required information to create a new account.
- Click Next to move to the Site Access and Study Assignment tab.
- Select +Add Study and check the applicable studies.
- Click Save.
Monitors can only view documents in the Approved for Use, Current, or Final states.
Need Help? Contact support at sitevaultsupport@veeva.com.
Grant Monitor/External User Access
Additional Resources
Study Connect Video Tutorial
Learn how to use Study Connect in a detailed, self-paced video tutorial.
Access TutorialHelp Center
Find comprehensive, self-service resources to learn more about SiteVault.
Visit the Help CenterCompliance Documentation
Access SiteVault 21 CFR 11, Annex 11, and GDPR compliance documentation.
Audit and Inspection ToolsQuestions?
Consult with a product expert with prior clinical research experience.
Contact Site SuccessGet answers on how-to questions or support with technical issues.
Contact Support